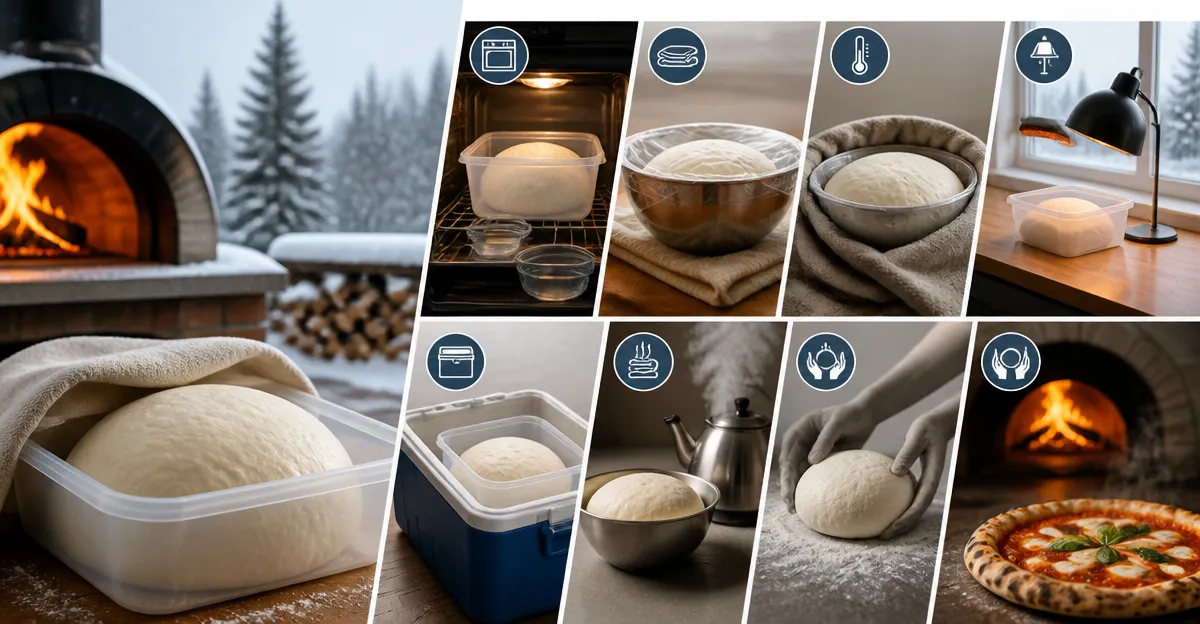
How to Proof Pizza Dough in Cold Weather for Wood-Fired Ovens: 7 Proven, Fast Methods for a Perfect Rise
Introduction
When winter temperatures dip below freezing, the fermentation process that gives pizza dough its characteristic flavor and texture can slow dramatically. This guide teaches the reader how to maintain an optimal proofing environment even when the outside air is frigid, ensuring a reliable rise for wood‑fired pizza ovens. By the end of the article, the reader will understand seven practical methods, the tools that accelerate proofing, and the science behind each technique.
Each method is described step‑by‑step, with product recommendations that serve as reliable tools rather than mandatory purchases. The reader can implement the strategies with common kitchen items, but the suggested equipment offers convenience, consistency, and durability for frequent bakers.
What You’ll Need
- Fresh pizza dough (prepared according to a trusted recipe)
- Thermometer (digital preferred for accuracy)
- Insulated containers or proofing boxes (see product links below)
- Warm water source (kettle or saucepan)
- Plastic wrap or a damp cloth
- Optional heating elements (oven, heating pad, or electric proofing cabinet)
Below are the recommended products that simplify each step. The first mention of each product is linked directly to its Amazon page.
1. Prepare the Dough at the Correct Starting Temperature
Begin by mixing the dough with water that is between 75°F and 80°F (24°C‑27°C). This initial warmth gives the yeast a head start before the dough is transferred to a cooler environment. After kneading, allow the dough to rest for 10‑15 minutes on a lightly floured surface. This short autolyse period improves gluten development and reduces the time needed for the final rise.
For the resting phase, the DoughMate Pizza Proofing Box is ideal. It provides a sealed, moisture‑preserving environment that prevents the dough from drying out during the short rest. The kit includes two trays, a lid, and a scraper, all made from NSF‑certified, BPA‑free polypropylene. At $58.50, it holds six 8‑10 oz dough balls per tray and fits comfortably in most refrigerators. Its 4.7‑star rating from 1,775 reviews confirms its reliability for home bakers.
Why this product matters: the insulated walls and snug lid maintain a temperature range of 70°F‑78°F, which is perfect for the autolyse stage. Alternative containers, such as simple bowls, can leak heat and cause uneven hydration.
2. Use an Insulated Proofing Box to Maintain Warmth
When the ambient temperature drops below 60°F, a standard bowl will not keep the dough warm enough for a proper rise. Place the dough in an insulated proofing box to create a micro‑climate that mimics a professional bakery.
The GSM Brands Pizza Proofing Box offers a commercial‑grade size of 17.25" × 13" × 3.54" and fits six 250‑300 g dough balls per compartment. Priced at $39.99 and rated 4.7 stars by 1,390 reviewers, it is constructed from BPA‑free food‑grade plastic and features a stackable design that saves refrigerator space.
Why this product matters: the box’s sturdy construction prevents warping under repeated temperature changes, and the lid creates a humid environment that reduces skin formation on the dough. Compared with a makeshift insulated bag, the GSM box offers consistent performance and easy cleaning.
3. Employ a Dedicated Electric Proofing Cabinet for Precise Control
For bakers who demand exact temperature regulation, an electric proofing cabinet eliminates guesswork. Set the cabinet to a temperature between 78°F and 85°F (25°C‑29°C) and let the dough rise for the recommended time.
The GIYUDOT Folding Bread Proofer provides adjustable temperature control from 50°F to 113°F, a 48‑hour timer, and a transparent acrylic window for visual monitoring. At $69.95, it carries a 4.6‑star rating from 517 reviews. Its five‑layer insulation and stainless‑steel rack ensure even heat distribution, while the foldable design stores to less than 4 inches when not in use.
Why this product matters: precise temperature control prevents over‑proofing, a common risk in cold climates. The timer allows the baker to set a proofing window and walk away confidently, unlike manual methods that require constant monitoring.
4. Use Your Oven with the Light On as a Warm Micro‑Environment
If an electric proofing cabinet is unavailable, the kitchen oven can serve as a low‑heat chamber. Pre‑heat the oven to the lowest setting (usually 170°F/77°C), then turn it off and leave the light on. The residual heat and illumination keep the interior around 80°F.
Place the dough in the DoughMate Pizza Proofing Box inside the oven. The lid retains moisture, while the oven’s insulated walls prevent rapid cooling. This method requires no additional purchase beyond the proofing box, making it cost‑effective for occasional bakers.
Important safety note: never leave the oven on unattended, and ensure the temperature never exceeds 90°F to avoid premature yeast activity.
5. Create a Warm Water Bath for Rapid Proofing
Fill a large bowl with warm water (approximately 90°F/32°C) and place a smaller, sealed container with the dough inside the water bath. The water’s thermal mass stabilizes the temperature, allowing the dough to rise faster than it would in cold air.
Using the Brod & Taylor Dough Proofing Box inside the water bath is advantageous. This 6‑liter container holds up to 3 kg of dough, is dishwasher safe, and features translucent walls with volume markings for easy monitoring. Priced at $24.95 with a 4.6‑star rating from 395 reviews, it resists odors and stains, ensuring the dough stays pure.
Why this product matters: the box’s sealed lid prevents water from entering while maintaining a humid environment, which is essential for dough elasticity. Compared with a simple zip‑top bag, the Brod & Taylor box offers superior durability and clearer visual cues.
6. Use a Heating Pad Beneath a Proofing Container
Place a low‑wattage heating pad on a countertop and set it to a gentle warm setting (around 80°F). Position the Chef Pomodoro Pizza Proofing Box on top of the pad. The box’s transparent, stackable trays allow you to monitor dough rise without removing the lid.
The Chef Pomodoro box measures 14" × 11" × 3" and fits four to six dough balls, making it suitable for small‑batch pizza nights. At $24.99 and a 4.5‑star rating from 1,470 reviewers, it includes a snap‑shut lid and a convenient carry handle for transport.
Why this product matters: the heating pad provides a gentle, even heat source that mimics a professional proofing drawer, while the box’s sealed environment retains moisture. This combination is more reliable than wrapping dough in a towel, which can become damp and uneven.
7. Assemble a Portable Insulated Cooler with a Hot Water Bottle
For outdoor or mobile pizza setups, an insulated cooler can serve as a temporary proofing chamber. Fill a sturdy hot water bottle with boiling water, seal it, and place it at the bottom of the cooler. Then nest the DoughMate Pizza Proofing Box on top.
The cooler’s thick walls retain heat for several hours, creating a stable environment for the dough. The DoughMate box’s moisture‑preserving lid prevents the dough from drying out, while its stackable trays allow multiple batches to be proofed simultaneously.
This method is especially useful for catering events where a wood‑fired oven is set up in a cold tent or garage. It requires only the proofing box and a reusable hot water bottle, keeping costs low while delivering consistent results.
Tips & Pro Tips
- Always measure the dough temperature before proofing; ideal starting temperature is 78°F‑80°F.
- Maintain humidity inside the proofing container by lightly misting the lid or using a damp towel.
- For sourdough or high‑hydration dough, extend the proofing time by 20‑30 minutes to compensate for colder ambient conditions.
- When using electric proofers, set the timer slightly shorter than the recipe’s rise time and check the dough; over‑proofing can lead to collapse.
- Label each container with the dough batch date and expected rise time to avoid confusion during busy pizza nights.
Troubleshooting
| Problem | Possible Cause | Solution |
|---|---|---|
| Dough not rising | Temperature below 70°F or yeast dead | Increase proofing temperature using a heated cabinet or warm water bath; verify yeast freshness. |
| Dough skin forming | Insufficient humidity | Cover dough with a damp cloth or use a lid with a moisture‑preserving seal, such as the DoughMate box. |
| Over‑proofed, collapsed dough | Proofing time too long or temperature too high | Reduce proofing time; set precise temperature on the GIYUDOT proofer and use the timer feature. |
Conclusion
Proofing pizza dough in cold weather no longer requires guesswork. By employing one of the seven methods outlined above, the baker can create a controlled environment that encourages consistent fermentation, even when outside temperatures are below freezing. The recommended tools—ranging from affordable plastic containers to a high‑tech electric proofer—provide flexibility for every budget and kitchen layout. Implement these strategies, monitor dough temperature, and enjoy perfectly risen pizza dough ready for the wood‑fired oven.
With practice, the baker will develop an intuition for selecting the most efficient method for any situation, ensuring that every pizza night delivers crusts with the desired airy crumb and crisp edge.
Products Mentioned in This Guide
Frequently Asked Questions
How can I keep pizza dough warm enough to rise when the indoor temperature is below freezing?
Place the dough in an insulated container or proofing box with a warm water bottle, or use a low‑heat oven set to 70‑80°F (21‑27°C) and turn it off before proofing.
What’s the quickest method to proof pizza dough in cold weather without special equipment?
Wrap the dough tightly in plastic, then nest it in a sealed zip‑top bag inside a bowl of warm (not hot) water for 30‑45 minutes.
Do I need a digital thermometer for proofing dough in winter?
Yes, a digital thermometer lets you monitor the dough’s environment and keep it within the ideal 75‑80°F (24‑27°C) range for consistent fermentation.
Can I use a wood‑fired oven to proof dough, and how?
Yes—preheat the oven briefly, turn it off, and place the dough inside with the door slightly ajar; the residual heat maintains a gentle rise.
How long should pizza dough proof in cold conditions compared to room temperature?
In cold weather it may take 1.5‑2× longer; aim for a doubled size, checking every 30 minutes after the first hour.