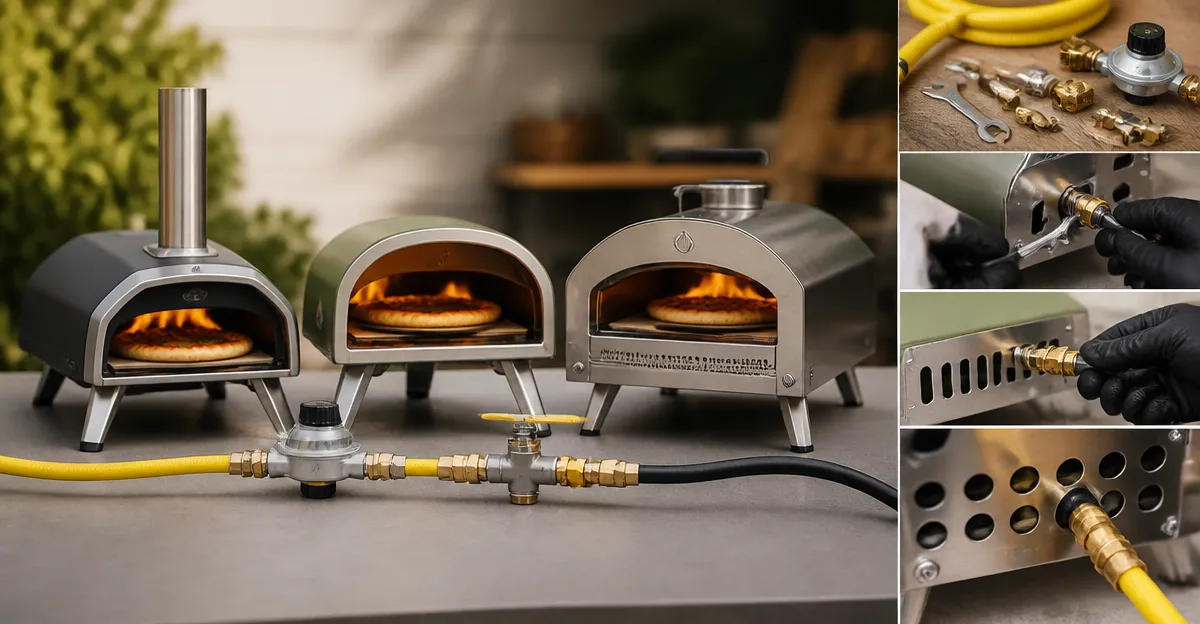
How to Convert a Portable Pizza Oven to Natural Gas: Safe Step‑by‑Step Guide for Ooni Karu, Gozney Roccbox & Big Horn
Introduction
One will learn how to replace wood, charcoal, or propane with a steady natural gas supply in a portable pizza oven. The conversion offers consistent heat, reduced emissions, and lower long‑term fuel costs. This guide explains each phase of the process, from evaluating compatibility to performing a leak test, while recommending tools that simplify the work. Readers will gain confidence to complete the conversion safely and efficiently.
What You'll Need
- Natural gas hose and quick‑connect fittings
- Gas regulator and propane hose (if converting from propane)
- Threaded check gauges and orifice wrench
- Adjustable wrenches, plumber's tape, and sealant
- Leak detection solution (soapy water)
All of the items are available from the products listed in the Blackstone Propane to Natural Gas Kit, Ooni Karu 12 Gas Burner, Ooni Karu 2 Pro Gas Burner, YFLWGFDA Gas Burner, and Uniflasy Gas Burner. Prices range from $34.37 to $140.00 and each product holds a rating of at least 4.2 stars, indicating strong customer satisfaction.
Step 1: Verify Oven Compatibility
Before any hardware is installed, confirm that the oven model supports a natural‑gas conversion kit. Ooni Karu 12 and Karu 2 Pro ovens are explicitly designed for gas attachments such as the Ooni Karu 12 Gas Burner and Ooni Karu 2 Pro Gas Burner. The Gozney Roccbox and Big Horn models often require a universal conversion kit like the Blackstone Propane to Natural Gas Kit, which includes a 10‑foot natural‑gas hose and quick‑connect fittings. Review the manufacturer's manual to locate the gas inlet port and ensure that the required orifice size matches the kit specifications.
Step 2: Shut Off Existing Fuel Sources
Safety begins by eliminating all active fuel sources. Turn off the propane tank valve, close any wood‑burning vents, and disconnect the current fuel line from the oven. Allow the oven to cool completely; residual heat can cause accidental ignition during the conversion. Verify that the workspace is well‑ventilated and that fire‑extinguishing equipment is readily available.
Step 3: Install the Natural‑Gas Hose
Attach the 10‑foot natural‑gas hose from the Blackstone Propane to Natural Gas Kit to the household gas line using the 3/8" quick‑connect fitting. The brass construction provides durability and corrosion resistance, while the quick‑connect system ensures a secure, leak‑free connection without specialized tools. Apply plumber's tape and a thin layer of sealant to the threaded ends before tightening. Use a wrench to achieve a snug fit, but avoid overtightening which could damage the fittings.
Step 4: Attach the Burner Assembly
For Ooni ovens, replace the existing wood or propane burner with the appropriate gas burner. The Ooni Karu 12 Gas Burner includes a stainless‑steel burner, regulator, and a 5‑foot hose that mates directly to the oven's rear port. Align the burner's inlet with the quick‑connect fitting on the hose, then secure it with the provided screws. The YFLWGFDA Gas Burner offers a comparable solution for generic 12‑inch ovens, reaching 950°F within 20‑25 minutes.
Step 5: Adjust Orifices for Natural Gas
The conversion kit supplies natural‑gas orifices that replace the propane‑specific jets. Using the 7mm orifice wrench from the kit, remove the existing orifices and install the new ones according to the diagram in the instruction booklet. Correct orifice size ensures optimal flame characteristics and prevents over‑pressurization. Verify that each orifice is seated fully before re‑attaching the burner.
Step 6: Perform a Leak Test
Mix dish soap with water and apply the solution to all connections, including the hose, quick‑connect fitting, and burner joints. Open the natural‑gas valve slowly; any bubbling indicates a leak that must be tightened immediately. Repeat the test until no bubbles appear, confirming a sealed system. This step is critical because even a small leak can lead to hazardous conditions.
Step 7: Ignite and Calibrate the Burner
With the oven door open, turn the propane tank knob counter‑clockwise until a click is heard, then hold the knob for three seconds to allow gas flow. Use the burner's heat‑control dial to ignite the flame; the Ooni Karu 2 Pro Gas Burner features an improved control knob that provides precise temperature regulation up to 950°F. Allow the oven to reach the desired temperature, then record the dial setting for future reference. Consistent calibration reduces the need for constant temperature monitoring.
Step 8: Verify Even Heat Distribution
Place an infrared thermometer on the cooking stone to measure temperature uniformity across the surface. The recommended range for pizza baking is 700‑800°F; variations greater than 50°F may indicate improper burner placement or obstructed airflow. Adjust the burner position or clear any debris that could impede flame spread. A well‑balanced heat profile yields crisp crusts and evenly melted toppings.
Step 9: Secure All Fasteners and Clean Up
After successful testing, tighten all screws, bolts, and clamps to the manufacturer's torque specifications. Remove any protective tape, excess sealant, and cleaning solution residues. Store tools such as the orifice wrench and check gauges in a dry location for future maintenance. A tidy installation reduces the risk of accidental damage during subsequent cooking sessions.
Tips & Pro Tips
- Perform the conversion in daylight; adequate lighting helps identify small leaks and ensures proper alignment of fittings.
- Keep a portable fire extinguisher nearby; natural gas fires can be extinguished quickly with a CO₂ or dry‑chemical extinguisher.
- When converting a multi‑fuel oven, label the gas inlet to avoid confusion with wood‑burning components.
- Schedule annual inspections of the hose and fittings; brass components can develop wear over time, especially in outdoor environments.
Troubleshooting
Flame is weak or uneven: Check that the orifices are the correct size for natural gas and that the regulator is not clogged. Replace the orifice if it appears carbon‑filled.
Leak persists after tightening: Replace the quick‑connect fitting; a damaged O‑ring can cause continuous seepage.
Oven does not reach target temperature: Verify that the gas pressure matches the regulator's specifications (28 mbar). Adjust the regulator or consult a licensed plumber if pressure is insufficient.
Conclusion
This guide has outlined a systematic approach to converting portable pizza ovens to natural gas, emphasizing safety, proper tooling, and performance verification. By following each step, one can enjoy reliable, high‑heat cooking without the inconvenience of propane refills or wood handling. The recommended products streamline the conversion while offering durability and positive user feedback. One should feel empowered to undertake the conversion and reap the benefits of consistent, clean energy.
Products Mentioned in This Guide
Frequently Asked Questions
Can any portable pizza oven be converted to natural gas?
Only models that support a gas conversion kit, such as Ooni Karu, Gozney Roccbox, and Big Horn, can be safely converted.
What tools are needed for the conversion?
You’ll need a natural‑gas hose, quick‑connect fittings, a regulator, threaded check gauges, an orifice wrench, adjustable wrenches, plumber’s tape, sealant, and a leak‑detection solution.
How do I test for gas leaks after conversion?
Apply a soap‑water solution to all connections; bubbles indicate a leak that must be tightened or resealed before use.
Do I need a special regulator when switching from propane to natural gas?
Yes, use a regulator rated for natural‑gas pressure, as propane regulators deliver higher pressure and are not compatible.
Is it safe to use the oven outdoors after converting to natural gas?
Yes, as long as the gas line is properly installed, leak‑tested, and the oven is placed on a stable, non‑flammable surface away from wind drafts.