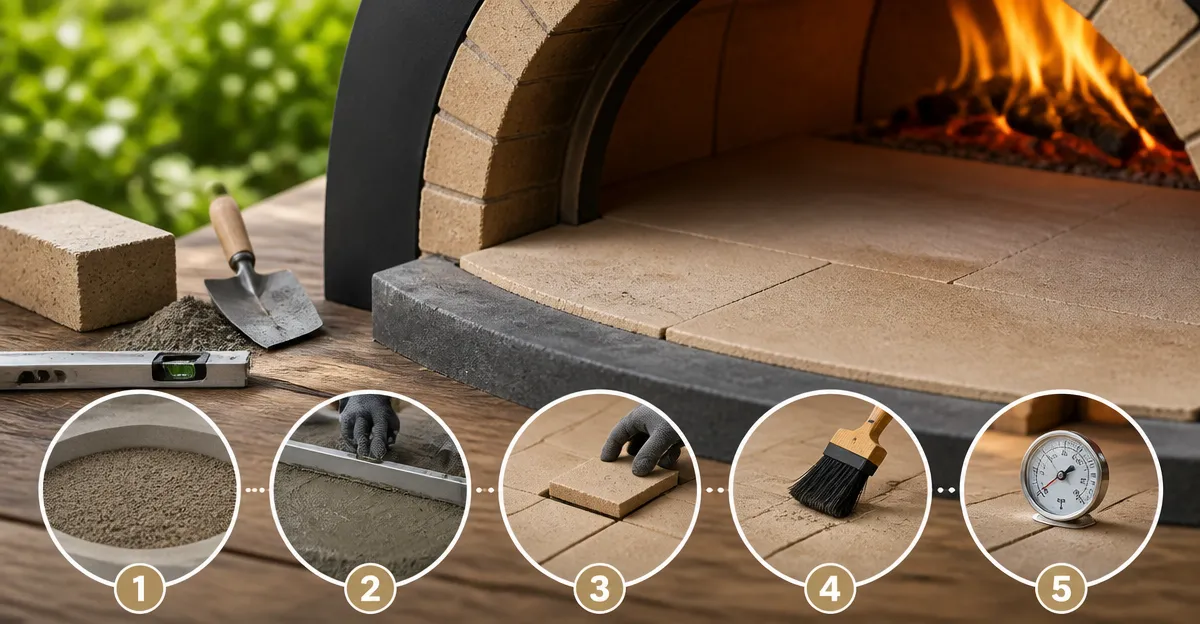
How to Prevent Cracks in Your Pizza Oven Floor: Step-by-Step Guide to a Durable, Crack-Free Oven
Introduction
One often discovers that a cracked oven floor reduces heat efficiency and compromises food quality. This guide explains how to protect the oven surface from thermal shock, uneven heating, and mechanical stress. By following the recommended procedures, one can extend the lifespan of the oven and maintain consistent cooking results. The information presented is valuable for both indoor bakers and outdoor pizza enthusiasts.
The guide also integrates carefully selected tools that simplify each step. The tools are presented as optional aids; the techniques remain effective without purchase. Nonetheless, using the recommended products can reduce effort and improve reliability. Readers will finish the article with a clear plan for a crack‑free pizza oven floor.
What You’ll Need
- Gentle cleaning brush or non‑abrasive sponge
- Heat‑resistant gloves
- Thermal barrier such as a pizza stone or steel (see product recommendations)
- Infrared thermometer for temperature monitoring
- Leveling tool to ensure even oven floor placement
The following products have been selected for their proven performance and positive customer feedback. Each product is linked to its Amazon page for convenient purchase.
Step 1: Assess the Oven Floor Material
The first task is to identify the composition of the oven floor. Common materials include firebrick, concrete, and pre‑installed stone or steel plates. Understanding the material determines the appropriate thermal expansion limits and cleaning methods. If the floor is firebrick, one should verify that it is rated for temperatures above the oven’s maximum operating range.
When the floor material is unknown, one may consult the manufacturer’s specifications or contact customer support. Accurate assessment prevents the use of incompatible cleaning agents that could accelerate cracking. It also informs the selection of a suitable thermal barrier for the next step.
Step 2: Clean the Surface Thoroughly
A clean surface allows heat to distribute evenly and reduces the risk of localized hot spots. Begin by allowing the oven to cool to below 100°F, then remove loose debris with a soft brush. Avoid steel wool or harsh chemicals, as they can create micro‑abrasions that become crack initiation points.
For stubborn residue, dampen a non‑abrasive sponge with warm water and gently scrub. Dry the floor completely before proceeding; moisture trapped beneath a thermal barrier can cause steam‑induced stress during heating. Regular cleaning after each use maintains a uniform surface and minimizes long‑term wear.
Step 3: Apply a Thermal Barrier
Introducing a high‑quality thermal barrier protects the oven floor from rapid temperature fluctuations. A well‑chosen pizza stone or steel absorbs and radiates heat evenly, reducing thermal shock on the underlying material. The following products are ideal for this purpose.
Waykea Pizza Stone offers natural cordierite construction, excellent thermal shock resistance, and a thickness of 0.6 inches. It costs $23.99, holds a rating of 4.5 stars from 864 reviews, and can withstand temperatures up to 1400°F without cracking. The stone’s ability to draw moisture away from the pizza surface also improves crust texture, making it a dual‑purpose tool for both protection and culinary quality.
For larger ovens or those that require even faster heat transfer, Chef Pomodoro Pizza Steel provides a 16×16 inch, ¼‑inch thick steel plate. Priced at $69.99 with a 4.6‑star rating from 693 reviews, the steel delivers superior conductivity and durability. Integrated lifting holes allow safe handling, and the steel develops a seasoned surface that reduces sticking over time. Selecting steel over stone is advantageous when one desires rapid heat recovery between batches.
Place the chosen barrier directly on the clean oven floor, ensuring full contact without gaps. Use a level to verify that the barrier sits evenly, as uneven placement can create stress concentrations that lead to cracks.
Step 4: Regulate Temperature Changes
Rapid temperature swings are the primary cause of floor cracking. One should preheat the oven gradually, allowing the floor and barrier to reach operating temperature together. For wood‑fired or multi‑fuel ovens, a controlled increase of 100°F per minute is advisable.
If the oven is equipped with a built‑in thermostat, set it to the desired temperature and monitor progress with an infrared thermometer. The Ooni Karu 12 exemplifies a portable oven that reaches 950°F within 15 minutes, yet it also includes a fuel tray designed to promote even airflow and prevent hot‑spot formation. Although the Karu 12 is itself an oven, its design principles illustrate the importance of steady heat buildup. The Karu 12 is priced at $248.95 and enjoys a 4.6‑star rating from 649 reviews.
When using propane or charcoal, avoid adding fuel abruptly after the oven has reached peak temperature. Instead, add small amounts and allow the fire to stabilize. This practice minimizes thermal gradients that could stress the floor material.
Step 5: Use Proper Cooking Techniques
Even cooking distributes heat uniformly across the barrier and underlying floor. One should rotate the pizza or baking tray halfway through the cooking cycle to prevent localized overheating. For ovens that lack a rotating mechanism, a handheld pizza peel can be employed to reposition the food.
Consider employing a gas‑powered oven such as the BIG HORN Portable Gas Pizza Oven for precise flame control. This model features dual‑side burners delivering up to 23,000 BTU, reaching 750°F in ten minutes and up to 1070°F at maximum. Priced at $239.98 with a 4.4‑star rating from 613 reviews, it includes a built‑in thermometer and independent heat knobs, allowing the user to fine‑tune temperature zones. Consistent heat reduces the likelihood of hot spots that could induce cracking.
When cooking multiple items, allow the barrier to recover its temperature between batches. This pause prevents cumulative heat stress on the floor and extends the life of both the barrier and the oven itself.
Step 6: Maintain and Inspect Regularly
Routine maintenance is essential for long‑term durability. After each cooking session, allow the oven to cool slowly before removing the thermal barrier. Inspect the floor for any hairline fractures, discoloration, or spalling. Early detection enables corrective action before a minor flaw becomes a major crack.
If cracks are observed, one can seal them with a high‑temperature refractory cement designed for ovens. However, the most effective preventive measure is to replace the barrier with a new one if it shows signs of wear. The BIG HORN 12" Multi‑Fuel Pizza Oven offers a versatile platform that accepts both wood and gas attachments, providing flexibility for different cooking styles. It is priced at $169.99, carries a 4.4‑star rating from 2,647 reviews, and includes a 12" stone that can be swapped out when necessary.
Finally, store the oven and its accessories in a dry environment to prevent moisture ingress, which can exacerbate thermal stress during heating cycles.
Tips & Pro Tips
- Always preheat the oven and barrier together; do not place a cold stone into a hot oven.
- Use a heat‑resistant silicone mat under the barrier if the oven floor is particularly porous.
- Rotate the pizza every 30 seconds for even browning and reduced localized heat.
- Schedule a quarterly deep clean, removing ash and debris that can obstruct airflow.
- When using wood, select seasoned hardwood to produce steady, clean flames.
Troubleshooting
| Problem | Possible Cause | Solution |
|---|---|---|
| Crack appears after a single use | Thermal shock from rapid temperature increase | Reduce preheat rate; use a thermal barrier such as the Waykea Pizza Stone. |
| Uneven cooking spots | Hot spots due to uneven fuel distribution | Adjust fuel tray on Ooni Karu 12; ensure barrier sits level. |
| Persistent smoke odor | Residue buildup on floor or barrier | Perform a thorough clean with a non‑abrasive sponge; replace barrier if damaged. |
Conclusion
One can prevent cracks in a pizza oven floor by assessing the material, maintaining a clean surface, applying an appropriate thermal barrier, regulating temperature changes, employing even cooking techniques, and performing regular inspections. The recommended products—Waykea Pizza Stone, Chef Pomodoro Pizza Steel, Ooni Karu 12, BIG HORN Portable Gas Pizza Oven, and BIG HORN 12" Multi‑Fuel Pizza Oven—provide reliable solutions that align with these best practices. By integrating these steps into routine cooking, one ensures a durable, crack‑free oven that delivers consistent, high‑quality results for years to come.
Products Mentioned in This Guide
Frequently Asked Questions
What causes cracks in a pizza oven floor?
Cracks usually result from thermal shock, uneven heating, and mechanical stress such as rapid temperature changes or heavy impacts.
How can I prevent thermal shock on my oven floor?
Gradually preheat the oven and avoid sudden temperature spikes by using a heat‑resistant barrier like a pizza stone or steel.
Is a leveling tool necessary for a crack‑free oven floor?
Yes, a level ensures the floor is even, which distributes heat uniformly and reduces stress points that can lead to cracks.
Can regular cleaning help avoid floor cracks?
Using a gentle brush or non‑abrasive sponge prevents surface damage while removing debris that could cause uneven heating.
Do I need an infrared thermometer to protect my oven floor?
An infrared thermometer lets you monitor surface temperatures accurately, helping you stay within safe heating limits and avoid overheating.